
Views: 0 Author: Site Editor Publish Time: 2026-07-15 Origin: Site


You sit down to work, and your seat slowly sinks toward the floor. This gradual drop ruins your posture and breaks your concentration. The culprit behind this frustrating experience is the pneumatic cylinder. Understanding exactly what is the cylinder under office chair used for prevents you from throwing away perfectly good furniture. This component acts as the central pillar of your ergonomic setup. It handles your weight, dictates your alignment, and absorbs daily physical shock.
Many users mistakenly believe a sinking seat means the entire piece of furniture is broken. This misunderstanding leads to unnecessary disposal of high-quality ergonomic equipment. The pneumatic cylinder is a highly standardized, replaceable part. It serves as the single point of failure for vertical movement. Once you diagnose a failing mechanism, you can easily restore your seating arrangement. We will walk through the core mechanics, evaluate replacement quality, and detail the exact steps needed to swap it out safely.
Industry professionals use several terms to describe this component. You might hear it called a gas cylinder, gas lift, pneumatic column, gas spring, or gas strut. Regardless of the name, the structural anatomy remains consistent across most commercial seating. The outer metal column, often called the standpipe, provides the rigid housing. Inside sits the pressurized gas spring and the piston rod.
At the top of the piston rod, you will find a small actuation valve. A bearing and washer assembly sits at the base to allow smooth rotation. Interestingly, this entire system uses no screws or bolts to attach to your furniture. It relies entirely on a friction-fit design known as a Morse taper. The tapered ends wedge tightly into the wheelbase and the seat mechanism. Every time you sit, your body weight drives the taper deeper into the socket, creating a rock-solid mechanical bond.
To understand the internal structure better, look at the primary components that make up the assembly:
The internal chamber of the cylinder is completely sealed. It contains a specific mixture of nitrogen gas and hydraulic fluids. This closed-loop system stores potential mechanical energy using compressed gas. When you activate the mechanism, the expanding gas pushes the piston upward. This allows the system to lift your weight effortlessly without any electrical components or external power sources.
This pneumatic design provides a distinct advantage: stepless office chair adjustment. Older mechanical systems relied on fixed notches or pins, limiting you to specific height increments. A gas spring allows for infinite micro-adjustments within its travel range. You can stop the seat at the exact millimeter needed for perfect ergonomic alignment. The hydraulic fluid inside also acts as a damper. When you drop into the seat, the fluid slows the compression, providing a soft, shock-absorbing cushion rather than a harsh mechanical stop.
You control this pressurized system using the lever located under your seat. This lever connects directly to a tilt mechanism plate. When you pull the lever upward, the metal plate pivots on a hinge. This pivoting action presses down on a small activation button or pin located at the very top of the cylinder.
Depressing this pin opens the internal valve. If your weight is off the seat, the compressed nitrogen forces the piston up. If you are sitting down, your body weight overcomes the gas pressure, forcing the piston down. Releasing the lever closes the valve instantly, locking the piston rod securely in its current position. The linkage must be perfectly aligned. If the lever bends or the mechanism plate warps, it might constantly press the pin, causing the chair to sink even if the cylinder itself is perfectly fine.
Not all pneumatic columns are built to the same standards. The industry uses a classification system to rate durability and weight capacity. These ratings align with ANSI/BIFMA testing standards, which dictate commercial furniture safety and reliability. BIFMA subjects these components to rigorous drop tests and cycle tests to ensure they can withstand years of abuse in a commercial office environment.
Class 1 and Class 2 cylinders are typically found in budget or disposable seating. They feature thin metal walls and low pressure tolerance, making them prone to early failure. Class 3 represents the standard commercial grade. These units reliably support up to 250 pounds and offer good longevity for typical daily use. Class 4 is the heavy-duty, premium grade. These cylinders utilize much thicker steel construction and higher internal pressure. A Class 4 unit is essential for maximizing chair stability and can safely support weights exceeding 330 pounds.
| Cylinder Class | Typical Application | Wall Thickness | Weight Capacity | Durability Rating |
|---|---|---|---|---|
| Class 1 | Light residential, budget chairs | 1.2mm | Under 150 lbs | Low |
| Class 2 | Standard residential | 1.5mm | Up to 200 lbs | Moderate |
| Class 3 | Commercial office standard | 2.0mm | Up to 250 lbs | High |
| Class 4 | Heavy-duty, 24/7 dispatch, big & tall | 2.5mm+ | 330 - 500+ lbs | Maximum |
When evaluating these components, physical dimensions matter just as much as the class rating. The industry standard for the outer cylinder diameter is 2 inches (50mm). The inner piston diameter typically measures 1.1 inches (28mm). These standard tapers ensure compatibility across a massive variety of furniture brands. You rarely need to buy a brand-specific replacement part as long as you match these two taper dimensions.
The "stroke length" defines the actual travel distance of the piston. A standard stroke length is usually around 4 to 5 inches. However, drafting stools require a much longer stroke length, often 8 to 10 inches. Selecting the correct stroke length determines your maximum and minimum seat height. If you buy a cylinder with a stroke length that is too short, your knees will sit higher than your hips. If you buy one that is too long, your feet will dangle off the floor, cutting off circulation to your lower legs.
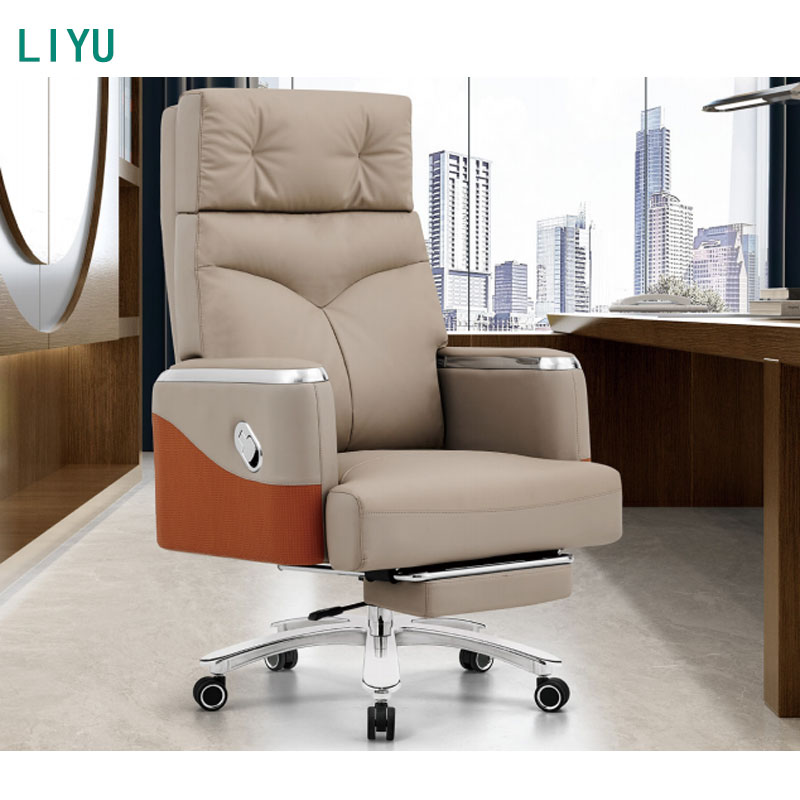
A sinking seat indicates a loss of internal pressure. This happens when the internal rubber O-rings wear down over time. Dust and debris can cause micro-scratches on the piston rod. As the rod moves up and down, these scratches tear at the rubber seals. Eventually, the pressurized nitrogen gas slowly escapes, removing the system's lifting capability.
Exceeding the weight capacity frequently will also blow out these seals prematurely. It is important to differentiate between a failing cylinder and a failing seat mechanism. If the seat sinks only when you sit, the cylinder seals are bad. If the seat drops immediately even without weight, your lever mechanism might be stuck, constantly depressing the release valve. You can test this by looking under the seat. If the metal lever arm is resting heavily on the cylinder pin without you touching the handle, the mechanism is the problem, not the gas spring.
Pneumatic cylinders contain gas under extreme pressure. You must treat these components with respect during diagnosis and removal. Never attempt to drill into the metal casing. Do not cut the outer column with a saw. Keep the component away from extreme heat sources or open flames. There are no user-serviceable parts inside the sealed chamber.
Breaching the sealed chamber can cause explosive depressurization. This can launch metal fragments or spray hydraulic fluid at high speeds. If a cylinder fails, it cannot be refilled or repaired internally. The only safe and viable solution is a complete swap of the sealed unit. Always wear safety glasses when working with heavy tools around pressurized components.
When a seat begins to sink, you face a choice between fixing the component or buying new furniture. High-end ergonomic seating represents a significant investment. Throwing away a premium frame simply because the gas spring failed makes poor financial sense. A heavy-duty aftermarket replacement part costs only a tiny fraction of a brand-new ergonomic setup.
Proper office chair repair preserves your initial investment. By swapping out the single failed component, you effectively reset the lifespan of the entire unit. This approach is highly economical and environmentally responsible, keeping large metal and plastic frames out of landfills. The labor involved takes less than thirty minutes, making it a highly efficient maintenance task for facility managers or home office workers.
Repair is the logical choice under several specific conditions. First, inspect the rest of the furniture. If the frame, casters, armrests, and upholstery remain in excellent condition, replacing the gas spring is highly recommended. You should also opt for repair if the unit is out of warranty but still provides excellent ergonomic support.
Sometimes, you might want to execute a gas lift cylinder replacement to change the stroke length. If you move from a standard desk to a standing desk, swapping to a drafting-height cylinder adapts your existing furniture to the new environment without requiring a completely new purchase. This modularity is one of the greatest benefits of standard commercial seating design.
There are scenarios where a full replacement makes more sense. Evaluate the overall structural integrity. If you find multiple points of failure—such as a cracked nylon wheelbase, a broken tilt mechanism, and torn fabric—repairing just the gas spring will not solve your problems. The structural foundation is already compromised.
Additionally, if you are using a very low-tier, disposable model, the time and effort required for extraction might exceed the residual value of the furniture itself. Cheap chairs often use non-standard parts that are difficult to source. In cases of severe structural degradation or extreme budget models, investing in a new, higher-quality ergonomic setup is the safer and more practical choice.
Executing a replacement requires a few specific tools. Do not attempt this with standard household pliers or a lightweight claw hammer. You need heavy-duty tools to break the friction-fit bonds.
Prepare your workspace by laying down the blanket. This protects your flooring from grease and prevents damage to the plastic components when you turn the furniture upside down. Ensure you have ample space to swing the mallet safely. If the chair has been in use for several years, apply the penetrating oil to the connection points the night before you plan to do the work. Let it soak into the tapers overnight.
Removing the old component is a battle against friction. Follow these steps methodically to separate the parts without damaging the wheelbase or the seat mechanism.
If the cylinder is heavily seized, do not hit the seat mechanism with the mallet. You will shatter the cast aluminum or bend the steel plates. Rely entirely on the pipe wrench leverage to break the top taper loose.
Installing the new component is incredibly straightforward. Remove any plastic shipping caps from the top of the new piston rod. If you leave the cap on, the actuation pin will not work, and the chair will not adjust.
Simply drop the wider bottom end of the new cylinder into the center hole of your wheelbase. Then, lift the seat assembly and guide the top hole of the mechanism over the new piston rod tip. Ensure everything is aligned vertically. Carefully sit on the seat. Your body weight will naturally press the tapered ends into their respective sockets. The friction-fit mechanism will lock itself securely into place during this first use. No tightening or additional tools are required.
Setting the correct vertical height is the baseline anchor for all other ergonomic adjustments. Your feet should rest flat on the floor with your knees at a 90-degree angle. If the cylinder fails and the seat sinks, this foundational posture is ruined, placing immediate strain on your lower back and thighs.
Proper vertical height coordinates directly with your backrest tilt and seat depth. When the height is correct, your lumbar support aligns perfectly with the natural curve of your spine. Maintaining a fully functional gas spring ensures that your tilt tension adjustments work as intended, allowing you to achieve a neutral, strain-free posture. If you are sitting too low, your pelvis tilts backward, flattening the lumbar spine and causing severe fatigue over an eight-hour shift.
You can significantly extend the life of your pneumatic components through proper actuation habits. Avoid dropping heavily into the seat. Sitting down with excessive force creates a massive, sudden spike in internal pressure. This shock can rupture the internal rubber seals instantly, turning a perfectly good cylinder into scrap metal.
Periodic maintenance also helps. Wipe down the exposed silver piston rod every few months with a clean microfiber cloth. This prevents dust, pet hair, and abrasive debris from accumulating. If debris builds up, the rod drags it down into the internal O-rings, causing micro-tears and premature pressure loss. A clean piston rod ensures the seals remain intact for years.
The environment plays a surprising role in mechanical longevity. Extreme temperature fluctuations can accelerate the degradation of internal rubber seals. If furniture is stored in an unheated warehouse during winter, the seals can become brittle and crack upon first use.
Similarly, prolonged exposure to direct, intense sunlight can dry out the lubrication on the piston rod. Maintain a stable, climate-controlled environment to keep the internal fluids viscous and the rubber seals pliable. This simple environmental awareness ensures your pneumatic components last for their full intended lifecycle.
To restore your seating setup and eliminate the sinking issue, execute the following steps:
A: Industry professionals refer to it by several names, including gas lift, pneumatic cylinder, gas spring, gas strut, or pneumatic column. All these terms describe the same pressurized component responsible for vertical height adjustment.
A: You can use temporary hacks like attaching hose clamps or slipping a PVC pipe over the piston rod to stop the sinking. However, these methods completely eliminate your ability to adjust the height and are not permanent mechanical fixes.
A: The tapered connection points are highly standardized, with 95% of chairs using a 2-inch base and a 1.1-inch top. However, the overall length of the outer column and the travel stroke vary significantly depending on the chair type.
A: Under standard daily use, a typical gas spring lasts between 3 to 5 years. Premium Class 4 cylinders can last up to 10 years if the user remains well under the maximum weight limit and avoids dropping heavily into the seat.
A: This happens due to pneumatic seal failure. The internal rubber O-rings degrade or tear over time, allowing the pressurized nitrogen gas to slowly escape. Without that internal pressure, the mechanism can no longer support your body weight.
A: You can often find the class rating stamped directly onto the metal casing of the outer column. If it is not stamped there, you must check the original manufacturer specifications or the product listing details.


