
Views: 0 Author: Site Editor Publish Time: 2026-07-23 Origin: Site


Room configuration directly dictates participant engagement, knowledge retention, and overall workshop success. Poorly planned training rooms create immediate friction points that derail learning objectives. Traffic bottlenecks frustrate attendees during breaks and transitions. Inadequate power access disrupts device-dependent sessions, leaving participants scrambling for wall outlets. Obstructed sightlines cause attendees in the back rows to tune out entirely. Rigid, heavy furniture setups prevent seamless transitions between independent focus work and collaborative group exercises. Strategic office workspace planning acts as the vital bridge between facility constraints and workshop success. The right spatial arrangement dictates the specific type of tables required for procurement, ensuring your physical environment actively supports your training curriculum rather than fighting against it.
You must define the primary use case before moving a single piece of furniture or ordering new inventory. Didactic learning involves lectures and presentations where focus remains strictly at the front of the room. Collaborative learning requires group exercises, active brainstorming, and peer-to-peer eye contact. Many modern workshops demand both formats within the same hour. You need to establish the requirement for smooth transitions between different learning environments within a single session. A static room fails when the agenda shifts from a keynote presentation to small group problem-solving. Facility managers must evaluate the curriculum to determine if the space requires fixed rows for testing or agile pods for team building.
| Learning Style | Primary Activity | Ideal Furniture Setup | Mobility Requirement |
|---|---|---|---|
| Didactic | Lectures, testing, presentations | Front-facing rows, continuous surfaces | Low (Fixed or heavy tables acceptable) |
| Collaborative | Brainstorming, group projects | Pods, clusters, facing seats | High (Casters and nesting mechanisms) |
| Hybrid | Mixed agenda, agile workshops | Easily reconfigurable modular units | Very High (Quick-release flip tops) |
Facility managers often face tension between maximizing headcount and maintaining an ergonomic work environment. Pushing room capacity to its absolute limit usually backfires. Staff cannot retain information if physical discomfort or cramped conditions distract them. You must establish a baseline requirement for personal space. Every participant needs enough surface area for their laptops, reference manuals, and beverages without bumping elbows with their neighbor. Comfort directly sustains attention spans. When you cram forty people into a room designed for thirty, the resulting heat, noise, and lack of elbow room will destroy the workshop's effectiveness. Prioritize usable workspace over maximum seating capacity.
Modern offices leverage training spaces as multi-use environments to maximize real estate efficiency. A room might feature a structured seminar room table setup in the morning and transition to a casual community layout by the afternoon. Evaluate the utility of selecting an office training table fleet that doubles as temporary touchdown stations or collaborative project desks. This flexibility maximizes the usage rate of the square footage. Dedicated, single-use rooms sit empty too often in agile work environments. By specifying tables with flip-tops and heavy-duty casters, facilities teams can clear the center of the room for town halls or standing networking events in under ten minutes.
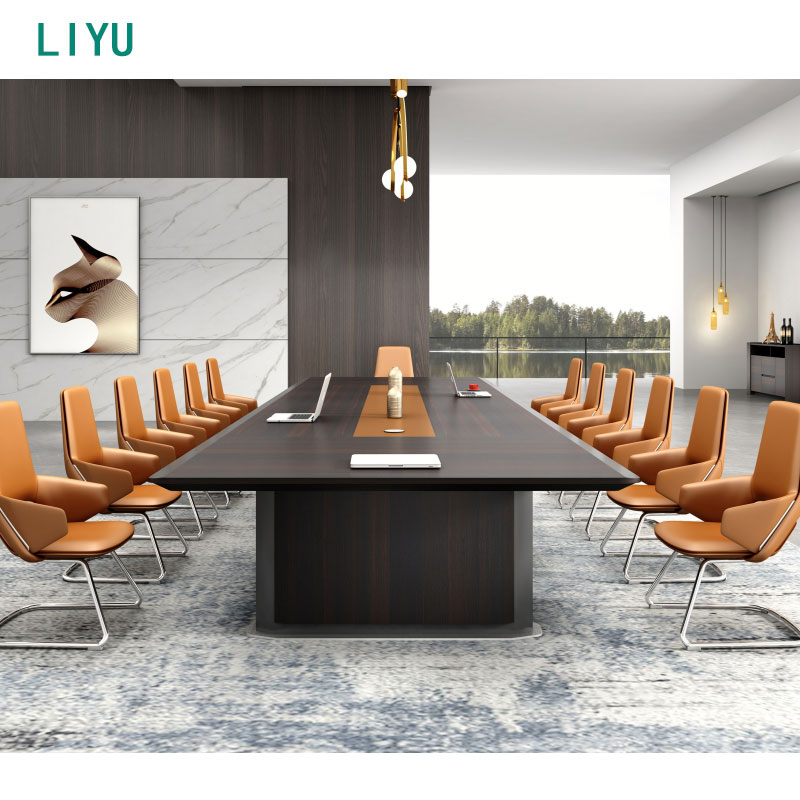
The standard classroom setup involves arranging tables in a row with two seats per table, facing the presenter. A single-sided configuration works best here. Position chairs strictly on one side of the row facing the front. This ensures direct sightlines and prevents participants from turning their backs to the screen or the speaker. This layout is best for information-dense, tech-heavy workshops requiring individual focus and minimal peer-to-peer distraction. It maximizes the number of forward-facing seats in rectangular rooms.
Tables are arranged in a U-shape to allow the facilitator to walk directly into the center of the room. This breaks down the physical barrier between the instructor and the attendees. The open center encourages eye contact across the room. This configuration is best for interactive training, Q&A sessions, and workshops requiring equal visibility among all participants. It keeps everyone engaged in a shared conversation. The U-shape requires significant floor space, making it less ideal for maximizing headcount, but it delivers superior engagement for groups of 15 to 25 people.
The pod arrangement involves grouping two to four tables together to create small islands throughout the room. Participants face each other rather than the front wall. This setup naturally encourages localized discussions. It is best for team-building exercises, problem-solving workshops, and highly collaborative sessions. Instructors can easily circulate between the different clusters to monitor group progress and provide targeted feedback. When setting up pods, ensure there is at least 48 inches of clearance between each island so the facilitator can walk freely without disrupting the groups.
This layout uses a large, continuous table setup. You can achieve this by pushing modular tables together into a traditional boardroom style. It creates a unified, formal environment. Everyone sits around a single central focal point. This arrangement is best for executive training, leadership workshops, and open-forum discussions where hierarchy is minimized and cross-table dialogue is the primary goal. Ensure the tables lock together securely using ganging brackets so the continuous surface does not drift apart during the session.
The chevron layout angles rows toward the center of the room, creating a V-shape. It maintains the high seating density of a standard classroom setup while significantly improving sightlines. Participants can see the presenter and the presentation screen more clearly without leaning forward. This layout is best for wider rooms where straight rows would force people at the far ends to crane their necks uncomfortably. The angled approach also creates a more dynamic visual aesthetic compared to rigid, straight lines.
Understanding standard training table dimensions is critical for accurate room mapping. Common sizes include 24x60, 24x72, and 30x72 inches. Seating density depends entirely on the technology used during the workshop. A 60-inch table comfortably fits two users with laptops, mice, and reference materials. A 72-inch table is required if you want to seat three users without heavy tech. You must also analyze height options. Traditional desk height sits at 29 to 30 inches and suits standard seating. Counter or bar height configurations paired with ergonomic stools create dynamic, standing-friendly active learning spaces that keep energy levels high during long afternoon sessions.
| Table Dimensions (Depth x Length) | Tech-Heavy Capacity (Laptops/Tablets) | Lecture-Only Capacity (Notebooks Only) | Best Use Case |
|---|---|---|---|
| 24" x 48" | 1 Person | 2 People | Tight spaces, individual testing |
| 24" x 60" | 2 People | 2 People | Standard classroom rows |
| 24" x 72" | 2 People | 3 People | High-density lecture halls |
| 30" x 72" | 2 People (Spacious) | 3 People | Pod arrangements, heavy materials |
Strict adherence to the 3-Foot Rule is mandatory for commercial spaces. You must space rows of tables at least 36 inches apart. This arrangement allows comfortable traffic flow during dismissals and meets strict fire code regulations for emergency egress. It provides enough room for participants to push back their chairs without hitting the table behind them. You must also outline ADA wheelchair clearance requirements. Aisles must be at least 36 inches wide, and accessible tables require a minimum of 27 inches of knee clearance from the floor to the underside of the table surface. Failing to plan for these clearances can result in failed building inspections and inaccessible training environments.
Chair selection directly impacts the actual footprint and clearance requirements of your setup. Mobile training chairs with casters require less push-out space than heavy sled-base chairs because users can roll in and out easily. Stackable stools work well for high-top tables but offer less back support for long sessions, making them better suited for short, one-hour workshops. Ergonomic task chairs provide maximum comfort for all-day training but demand wider aisles due to their larger star bases. You must evaluate these pairings carefully to maintain a functional and comfortable environment. Do not pair a narrow 24-inch deep table with a massive executive task chair, as the proportions will crowd the aisle.
Agile spaces require modular training furniture to adapt to changing daily schedules. Evaluate the mechanical reliability of flip-top tables for high-turnover rooms. The release mechanisms must be intuitive, requiring only one hand to operate, and durable enough to withstand daily use. Consider the storage footprint carefully. Nesting tables reduce storage requirements significantly compared to fixed-leg tables. You can flip the tops vertically and push the frames together, clearing the room for standing events or different furniture configurations in minutes. Look for offset leg designs that allow the tables to nest tightly together, minimizing the depth of the stored stack.
Modern workshops run on laptops, tablets, and smartphones. Analyze the necessity of daisy-chained power systems for tech-heavy workshops. Built-in power prevents dangerous extension cords from snaking across the floor. Compare surface-mounted power modules against under-desk troughs. Surface modules provide immediate, visible access for users, reducing the time spent fumbling for outlets. Under-desk troughs keep the work surface clear for paperwork but require users to reach underneath to plug in. For modular setups, specify quick-disconnect power cables that allow facilities staff to link tables together rapidly without calling an electrician.
Mobility dictates how easily you can reset a room between sessions. Assess the trade-offs between locking casters and leveling glides. Locking casters allow for rapid reconfiguration by a single person. They are essential for multi-purpose rooms that change layouts frequently. Ensure the casters are dual-wheel and feature a hard tread for carpeted floors or a soft polyurethane tread for hard surfaces like polished concrete. Leveling glides provide superior stability on uneven floors and are better suited for semi-permanent seminar setups where tables rarely move. If you choose casters, verify that at least two wheels on each table have heavy-duty locking brakes to prevent the table from rolling away while participants are typing.
Purchasing unpowered tables for laptop-mandatory training leads to hazardous extension cord use. This creates severe tripping hazards and overloads wall outlets, potentially tripping circuit breakers mid-presentation. To mitigate this risk, conduct a thorough facility power audit before finalizing your purchase. Map out the location of every wall outlet and floor core. Opt for UL-listed daisy-chain power systems that allow multiple tables to run off a single floor core safely. Calculate the total amperage draw of the laptops to ensure you do not exceed the circuit's capacity. Planning the furniture without planning the power routing is a guaranteed path to a failed installation.
Prioritizing maximum capacity over visibility results in disengaged participants at the rear or sides of the room. If attendees cannot see the screen or the whiteboard, they will stop paying attention and start checking their phones. Mitigate this by mapping the room using CAD or floor planning software. Physically tape out the table dimensions on the floor before ordering. Walk the room to verify sightlines from every planned seat. Sit in a chair at the back corner of the taped layout and check if the presenter's area is visible. If a structural column blocks the view, you must adjust the layout or remove that seat entirely.
Selecting lightweight, low-pressure laminate tables to save money often results in surfaces that warp, scratch, or chip under heavy commercial use. Training rooms endure high traffic, frequent reconfigurations, and constant impacts from bags and equipment. Specify high-pressure laminate (HPL) tops and heavy-gauge steel frames for longevity. HPL resists scratches and moisture much better than standard melamine. Ensure the edges feature a durable PVC or urethane edge band to protect against impact damage when tables are bumped together during room resets. Durable materials prevent the room from looking dilapidated after just one year of use, protecting your initial investment.
A: Standard tables typically feature depths of 24 or 30 inches. Common lengths are 48, 60, and 72 inches. A 60-inch table comfortably seats two people with laptops, while a 72-inch table can seat three people for lecture-only setups.
A: You must leave a minimum of 36 inches between rows. This spacing ensures safe traffic flow, allows sufficient room for chair push-out, and strictly complies with standard fire code regulations for emergency egress.
A: The Pod/Cluster or U-Shape arrangements are best for collaboration. Using modular training furniture to create small groups encourages peer-to-peer discussion and allows the facilitator to interact closely with each team.
A: Yes, built-in power is necessary for any session lasting over two hours where laptops or tablets are required. Integrated power prevents battery anxiety and eliminates dangerous tripping hazards caused by extension cords.
A: A 72-inch table fits two people comfortably when using laptops and reference materials. It can accommodate three people for lecture-only setups where participants only need space for a small notebook.
A: Conference tables are typically large, fixed, and heavy, designed for central meetings. Training tables are lightweight, modular, and often feature flip-tops and casters for quick, front-facing classroom reconfigurations.
A: Training tables focus on mobility, nesting, and quick reconfiguration for structured learning. Media tables integrate shared AV screens for presentations. Community tables act as fixed, casual collaboration zones in breakrooms or open areas.


